
Python is great programming (scripting) language that is supported on all platforms. Embedded enthusiasts love it because of the variety of modules that connect things to the internet and other crazy stuff by writing only a few code lines. Today my interest was to read serial data using Python 3.3 and the pyserial module. Python 3.3 is still fresh, and there is a majority of modules that need to be ported from Python 2 to Python 3, but I hope soon they will here. The serial module seems to be working fine in Windows 7 x64, and I decided to share my experience.
First of all download and install Python 3 (current release is Python 3.3)
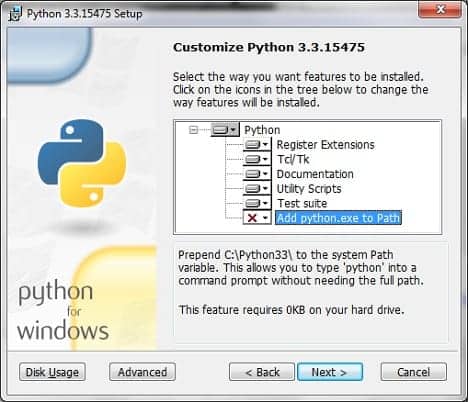
Just be sure to include “Add python.exe to Path” so you could run Python anywhere on your computer. We won’t go into details on how to set up this tool. It is pretty robust. After setup, python install is placed in C:\Python33. To test if things work OK open the command prompt and type python; you should see the python prompt:
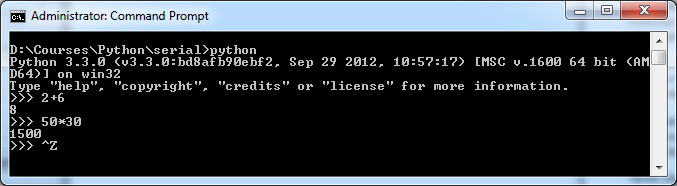
Here you can instantly do the basic stuff like math, run basic python commands, and so on.
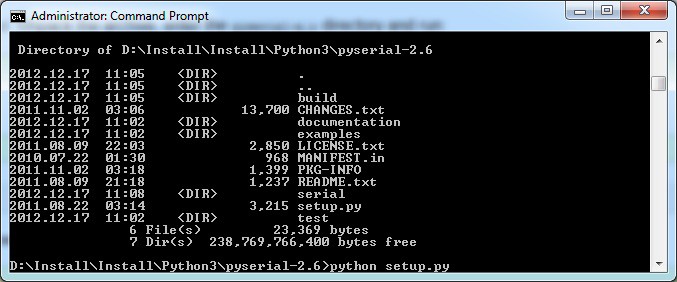
After we made sure Python is ready, then we need the pyserial module. It is used to implement serial communications using the serial port. This is the number one module used by Arduino users and microcontroller programmers who want to connect devices to the computer using Python. First of all, download the latest pyserial. Currently, it is a pyserial-2.6.tar.gz. Place package anywhere in your computer and extract it. Using command prompt navigate to the pyserial-2.6 folder where the setup.py file is located. Then enter the simple command:
python setup.py install
Then set up automatically installs pyserial module. You can check if it the by going to C:/Python33/Lib/site-packages. Here you should see the serial folder.
Make sure you run Command Prompt as Administrator! Otherwise, you won’t be able to use the serial module to check if it’s working in command prompt type python. Then in Python, shell-type import serial. If no errors occurred, then it means the serial module is working.
Now the fun part. From code snippets found on the internet, I put a small python script that lists all existing serial ports. Then prompts the user to select the port to use and then opens it and reads incoming data lines that are printed in console immediately:
#! /usr/bin/env python3
import serial
def scan():
    """scan for available ports. return a list of tuples (num, name)"""
    available = []
    for i in range(256):
        try:
            s = serial.Serial(i)
            available.append( (i, s.portstr))
            s.close()   # explicit close 'cause of delayed GC in java
        except serial.SerialException:
            pass
    return available
if __name__=='__main__':
    print ("Found ports:")
    for n,s in scan():
        print ("(%d) %s" % (n,s))
    selection = input("Enter port number:")
    try:
        ser = serial.Serial(eval(selection), 9600, timeout=1)
        print("connected to: " + ser.portstr)
    except serial.SerialException:
        pass
    while True:
        # Read a line and convert it from b'xxx\r\n' to xxx
        line = ser.readline().decode('utf-8')[:-2]
        if line:  # If it isn't a blank line
            print(line)
ser.close()
The script can be edited with any editor you like. I find the Programmer’s Notepad to be pretty good. Make sure you name the file with the .py extension. To run the script, using command prompt, navigate to file location and then run it by typing:
py yourfile.py
and pressing enter. You should see something similar:
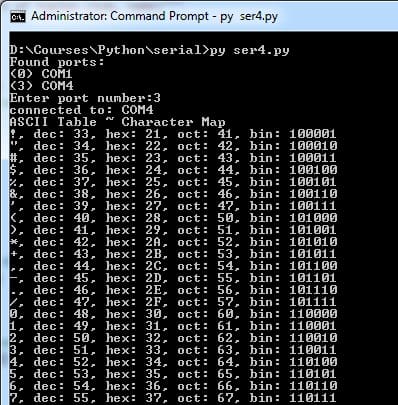
As you can see program found two ports – COM1 and COM4 with indexes 0 and 3. To select a port, you need to type the index number, which in my case were 3. The program confirms that we are connected to COM4 and start receiving string lines.
For demonstration, I used the ChipKIT UNO32 board and Mpide IDE, which works the same as Arduino. In code examples, you can find the ASCII table generating code. It simply sends all tables via the serial interface. You don’t need to edit code – upload sketch into ChipKIT or Arduino if you like and run it.

With this simple script, we made a straightforward terminal. We can extract data, do some processing, store it in a file, or draw graphs of numeric values with further coding.