


Writing software is a complex task. In every microcontroller program, you usually try to reuse previously registered libraries, downloaded code, and other data that is being updated. What if you are developing something in the team? How do you keep track of everything? Storing project files in directories eventually gets messy – finally, you lose track of what’s done. For instance, sometimes, you have written an LCD library and used it in several microcontroller projects. But eventually, you found a bug or optimized code. Usually, you would have to copy new library files in every project to keep updated. This is hard when you already have dozens of projects. There is one way to stay organized by using version control software. In this case, we will talk about SVN.
Subversion (SVN) is an open-source system that allows controlling files and folders, keep track of changes made during the time. Simply speaking, SVN is a virtual file system that keeps track of every change in files, and directories. It’s a clever way of storing project files whether you are working alone or in a team. Using this system-wise, you will always have things organized and never lose the version of your files again.
TortoiseSVN, your repository tool
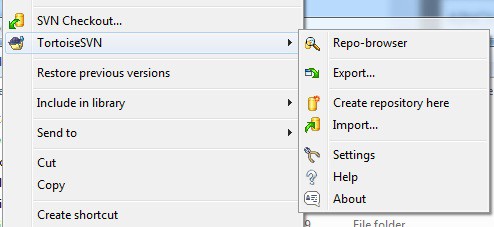
TortoiseSVN is a popular tool to work with the SVN system. You can download it from the project site here. We won’t be discussing how to install it on your machine, as it is well described in the documentation you can download here. So Assume you already downloaded and installed one that fits your operating system. For instance, if you have 64-bit Windows – download TortoiseSVN-1.7.10.23359-x64-svn-1.7.7.msi or later release if it’s already there. After installation, click the right mouse button on any folder, and you should see new menu items:
This means that installation went smoothly, and you can continue further. Before we begin, there are a couple of terms to be remembered—repository and working copy (WC).
The repository is an SVN itself where file structure is stored. It also keeps all changes since project creation. Every change is assigned with the revision number to keep track. Each revision can be accessed and used when needed. Changes cannot be made inside the repository for this; a local working copy is used. All changes are made here, and then they are fixed in the warehouse with the latest revision number.
SVN Repo-browser
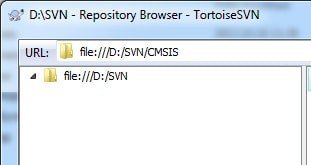
Repo-browser gives us access to projects stored in the repository. Using this tool, we can create, import new projects, copy projects to working copy, and do other things. Let’s go by example to make it simpler. Create a directory somewhere on your hard drive—for instance, D:\SVN. Click the right mouse button on it and select TortoiseSVN->Create repository here. What happens here is that the folder becomes a place for a repository where all necessary structure is created to hold your projects. If you open Repo-browser, you will see that an empty repository named file:///D:/SVN is created.
Now you can create or add your projects here. First of all, create a project folder where your project will be. Name it as you would name your next project. For instance AVR LCD:
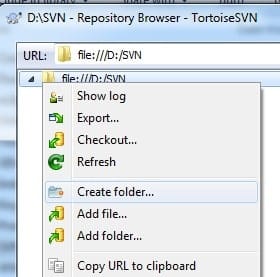
And then, in this folder, create three additional folders named branch, tags, and trunk. You should see this in Repo-browser:
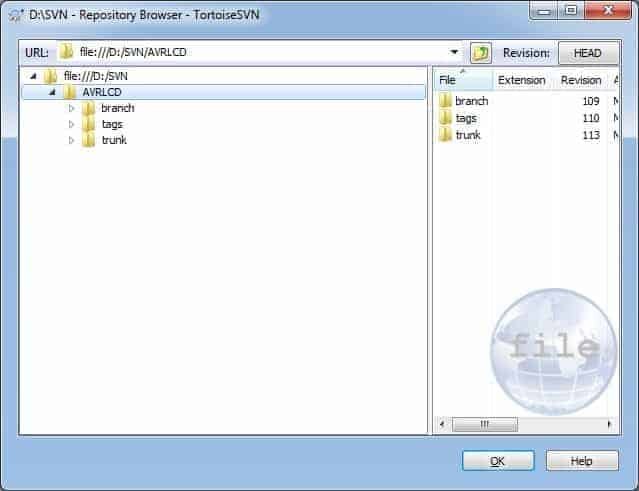
So why these three weird folders? Each of them has a particular purpose. Main project files are stored in the trunk folder, Which is a place for the current project. The branch folder is used when your project evolves into several related projects that have
Now let’s import the existing project into the repository. To do so, locate the project folder on your hard drive, click right click on it, and select TortoiseSVN->Import. A dialog window will pop up asking where to import the project:
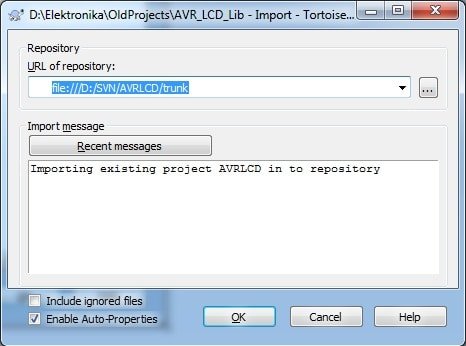
We tell you to import the project into our AVR LCD project’s trunk folder by writing URL: file:///D:/SVN/AVRLCD/trunk. Be sure on each action to write short messages of your actions. This helps to keep track of what’s done. After confirmation, an import window opens where you can see what files were imported:
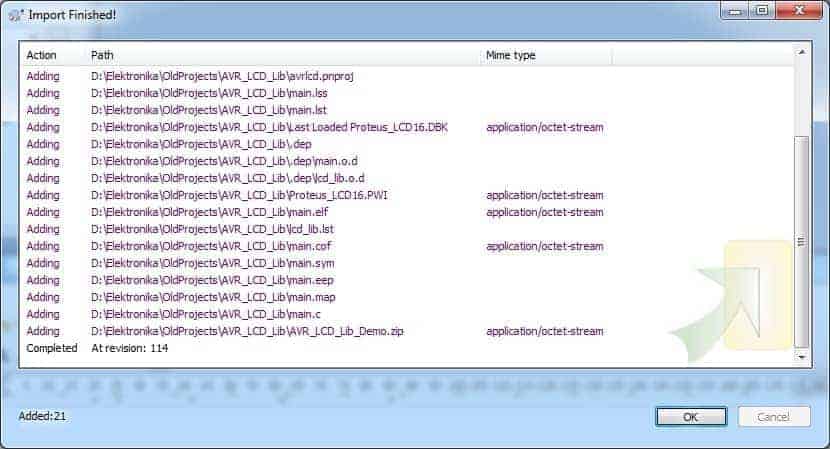
It automatically adds a revision number to the project. Don’t afraid of import fails. You can delete a project in Repo browser and start over. Note that import can be performed by simply dragging files into the directory. Once you have successfully imported or created the project, later actions with project files must be done using the project’s Working Copy.
Using Working Copy
Let

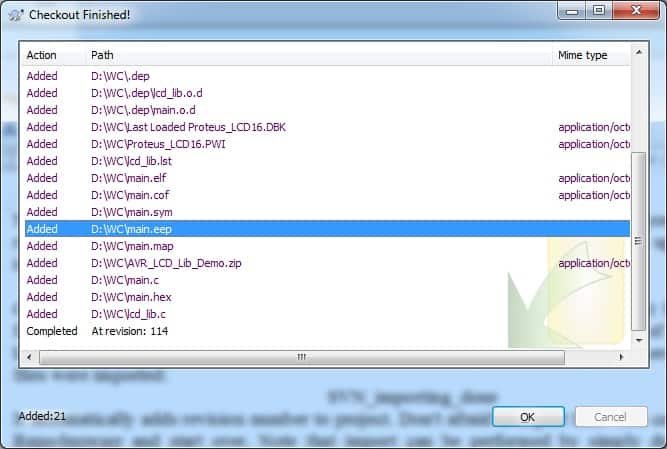
Select Checkout directory your WC directory and click OK. Files from the trunk folder are then copied to the working directory.
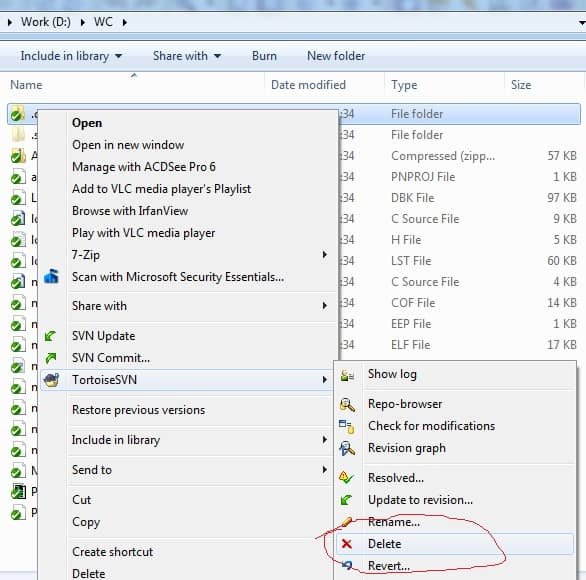
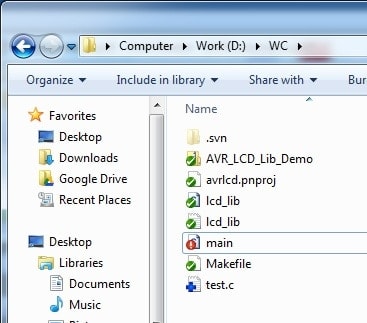
Now you can go to the WC directory and do your necessary changes, writing code, creating new files, or deleting some.
Simple actions required in the working copy
There are some rules you need to follow when working with the working copy. Since working copy now holds some hidden information (in
Same situation with adding new files to working copy. Say you are creating a new C file in your project named test.c. Create it, and you will see the
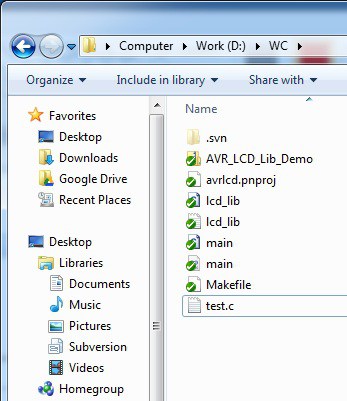
It does not have a checkmark, what means SVN does not know it is here. To make it happen, click on the file right mouse button and select the menu TortoiseSVN->Add. A small plus sign appears on the file icon, meaning that it will be added to the repository on the next commit.
If you edit existing files, you don’t have to do additional actions. SVN will track changes automatically. Once you save the edited file – a note mark will appear near the file icon:
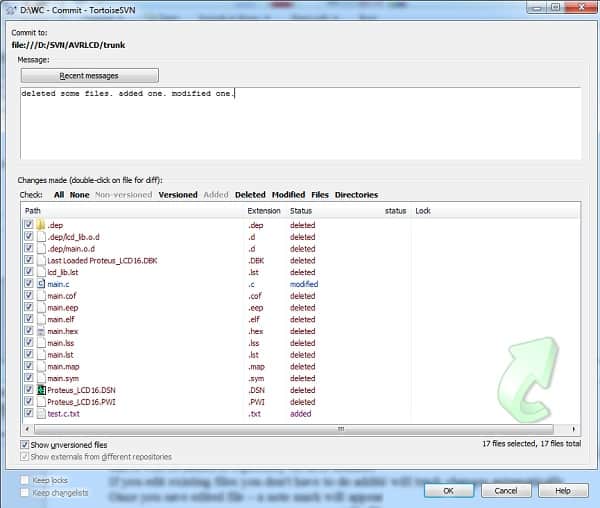
Let us say you are done for today and want to store current changes to the repository. Just click on the WC directory right mouse button and select SVN Commit. In the next window, you will see a list of files that will be changed in the repository. Some of them will be modified; some of them will be deleted or added. In the message, the window will surely add a brief note on what’s changed.
Once you click OK, changes will be made to the repository:
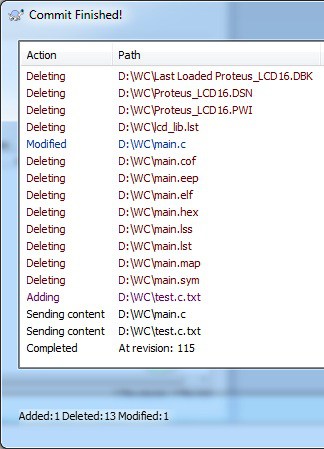
As you can see revision number of projects increased. As we mentioned, the SVN repository keeps all files from the beginning of project creation. So you can always reverse back to earlier revision if needed. This can be done by changing the revision number in the repository browser.